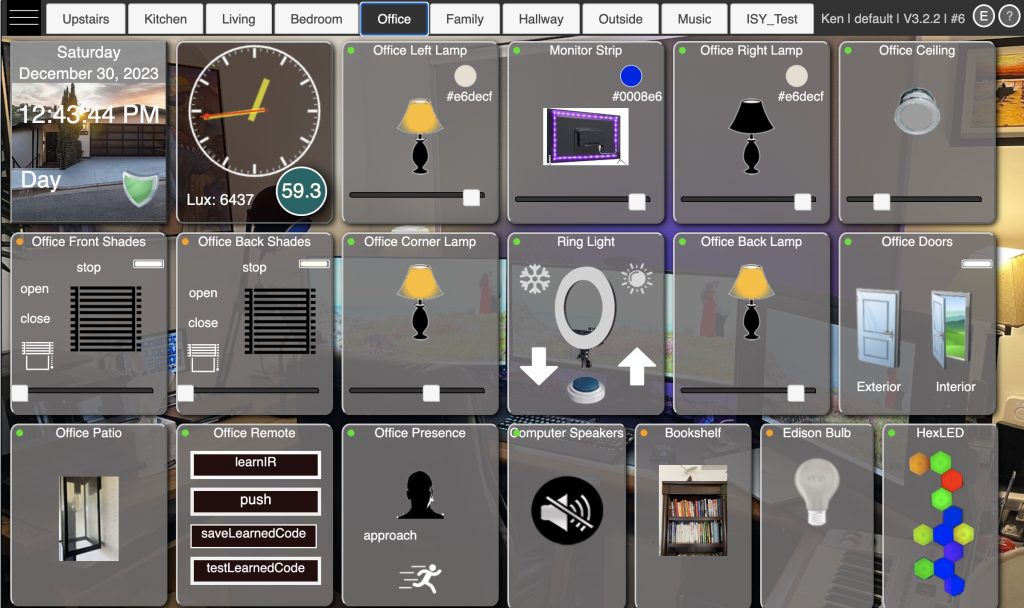
This page describes main HousePanel operation features, including how to activate tiles and adjust what displays on each page. Most of it will be obvious and intuitive, but a few hidden gems require explanation. HousePanel screen should look something like this by default:
For starters, you can browse different rooms by clicking on any tab at the top of the page. Notice that the room display changes INSTANTLY! This is because HousePanel renders all pages in advance and organizes them into tabs. When you select a different tab you are just telling HP to show that tab that was previously created.
Menu Items
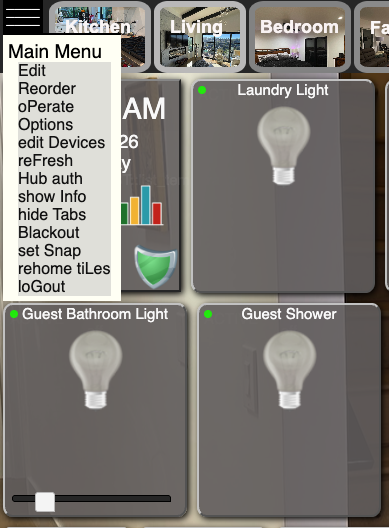
Clicking on the hamburger symbol in the upper left hand corner will display the menu shown here on the right. The letter that is capitalized is the shortcut letter for selecting that menu item without using the hamburger menu. For example, from the main screen pressing the key “R” will invoke the Reorder command. The actions take for each command are relatively self explanatory, with a few exceptions:
- Edit: enter edit mode enabling tiles to be edited (see Edit Mode below)
- Reorder: enter reorder mode enabling tiles to be reordered (see Reorder Mode below)
- oPerate: exit edit or reorder mode
- Options: go to the Options page
- edit Devices: go to the Bulk Add/Remove Devices page (see Devices Bulk Editing below)
- reFresh: update the state of all devices for all hubs
- Hub auth: go to the authorization page for adding, updating, or deleting hubs
- show Info: load a page showing status information about your smart home
- hide Tabs: hide the tabs forcing this panel to only show the current room
- Blackout: turn the screen blank and rotate photos if that mode is set
- set Snap: toggles “snap to” mode. In snap to mode files moved in edit mode snap to an invisible grid set at every 5 pixels
- rehome tiLes: removes user locations from all tiles on the shown page making them all available to be reordered
- loGout: log out the current user and go back to the login page
Click Actions
Most actions taken during HousePanel operation involve clicking on things. While on any page, you can click or tap on certain fields of a tile to change its state. For example, clicking on the light bulb in the “Office Back Lamp” tile will turn the light off if it is on, and will turn it on if it is off. If you click on a closed garage door, it will open. On dimmer tiles you change the intensity of the light by moving the slider. When you do this the light will turn on if it is off. Bulb type lights, like Office Left Lamp above, have a little round circle showing the current color setting. Clicking on this circle will open a color palette where you can select the color. To close the palette, click anywhere other than inside the palette.
If the item you click on has no action associated with it, the status of the tile will be displayed. Contacts, motion sensors, clocks, and blanks are examples of display-only tiles so clicking on them will cause no action. However, some display-only tiles report details when they are clicked. For example, clicking on the “Office Doors” tile will display a small window telling the user the state of the door, including all attributes. The “Office Doors” tile also shows off an advanced tile linking feature, whereby the status of an item on one tile can be linked to show on any other tile. This is explained in more detail in the Tile Customizer section later.
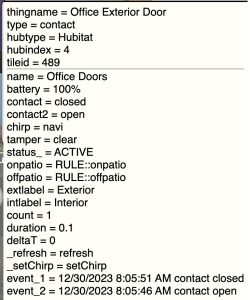
Status windows like the one shown here will be displayed whenever something is clicked on that doesn’t invoke an action.. If you are using a computer, the cursor will change to a pointer when you hover over things that can be clicked to change state.
Some tiles such as thermostat and music tiles have multiple controls that can be individually controlled by clicking on them. For example, each thermostat has a heater and an AC control and each one has up and down arrows that can be clicked to adjust the temperature setting. On music tiles, play, pause, skip, and stop can also be clicked on.
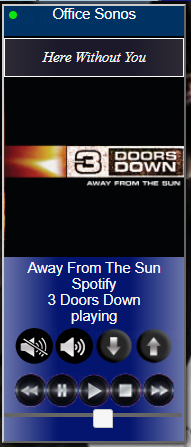
Music tiles retrieve the album art for most sources. This works for Hubitat music tiles and for Sonos native devices. The tile to the right shows what this looks like. If you have the browser control panel open (F12 on Chrome), clicking on things will return status information to that screen. This is a great way to see if your panel is working properly.
Edit Mode
One of the most exciting features of HousePanel is the ability to highly customize its look and feel. The first level of customization involves simply moving existing tiles around on a page. To do this, you need to enter edit mode using the Edit menu option or pressing the “E” key. You can also click the circled “E” in the upper right corner. When you are in this mode, tiles can be moved around freely on the page by clicking and dragging them with your mouse. Editing is disabled for tablets, so you must use a desktop browser and a mouse to do editing. Once a tile is moved, it changes from “fixed” mode to “absolute” mode. When in absolute mode it will be excluded from tile reordering. All tiles in fixed mode will be shown next to each other in their defined order. Tiles in absolute mode will be shown wherever they are dragged to. If you want to return a tile in absolute mode back to fixed mode, click the circled R shown in the upper right corner of the tile and it will snap back into the order that it had previously. The R will only be visible when you hover your mouse over the tile. To return all tiles select the “rehome tiLes” menu option or press the “L” key when you are not in edit mode. This is handy for situations when a tile has been accidentally moved and is covered by other fixed tiles.
Edit mode will look something like this:
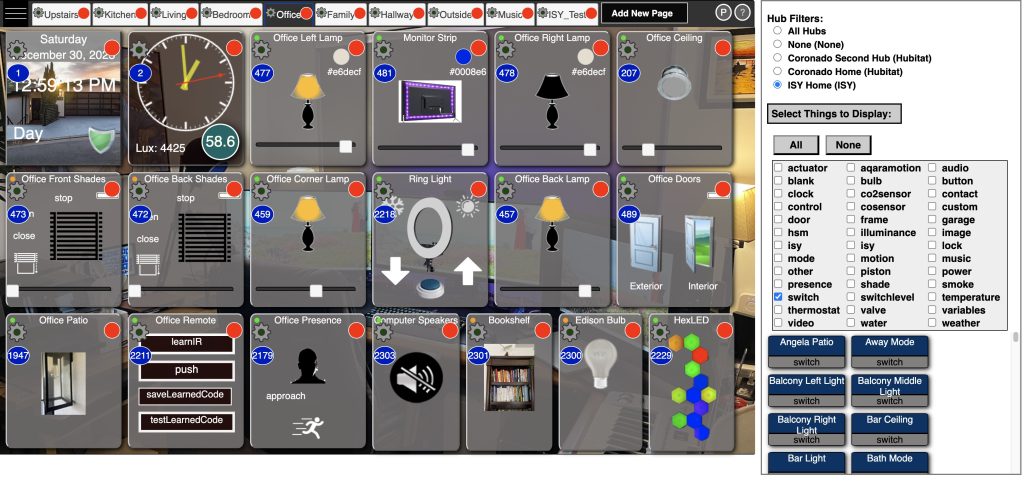
The gear icons is used to activate the Tile Editor. The red dots are clicked on to delete a tile or a page. Similar gear icons and red dots are shown on each tile for entering edit mode or to delete that tile. If you select a red dot to delete a tile or page, you will be prompted to confirm. Upon confirmation the tile will be removed from the room. Clicking on the blue circle will launch the Tile Customizer. Tile Editor and Tile Customizer are documented in later sections. When in edit mode you can also add pages and add tiles using drag and drop from the library shown on the right.
While in Edit mode a catalog will display on the right hand side as shown above. This catalog lists devices you have authorized in alphabetical order organized by hub. You can select all hubs, the “None” hub, or a specific hub by name. The None hub will list only hub-less devices such as clocks, images, and frames. The devices are shown in the bottom half of the catalog with the name on top with a blue background and bold white font, and the type of device on the bottom half. To add a device simply drag one of these boxes from the catalog onto the main window of the page. A confirmation box will appear – click on Yes to confirm addition of the device. The catalog may be shown off screen in which case you can move it into a more visible location. To exit edit mode, select oPerate from the menu, or press the Esc or “P” key, or click on the circled P in the upper right corner.
Reorder Mode
To reorder tiles or rooms, enter Reorder mode by selecting “Reorder” from the main menu, or press the “R” key. While in this mode things can be dragged left and right or up and down and will be automatically snapped into place based on their order. Reorder mode only applies to tiles that have not been moved in edit mode. Tiles that have been repositioned in Edit Mode will be ignored in Reorder Mode. You can restore any tile that has been repositioned or resized in Edit Mode by clicking the R shown below the red dot while in Edit Mode. While in reorder mode, each tile that can be reordered will be shown with a circled number indicating it’s order on the page as shown below.
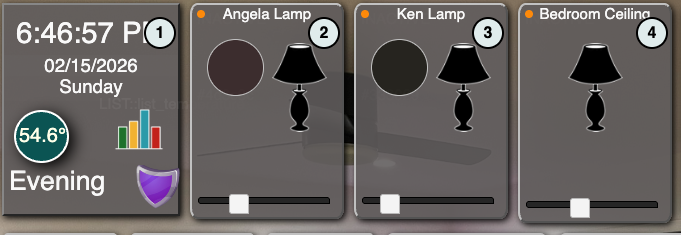
Reorder mode also allows room tabs to be moved to a different order. To do this, simply click and hold a tab and move it left or right to reorder your rooms. To exit reorder mode, select oPerate from the menu, or press the Esc or “P” key, or click on the circled P in the upper right corner.
Devices Bulk Editing
You can also add or remove devices (tiles) on the Device Edit page accessed by selecting “edit Devices” in the menu or pressing the “D” key. This command will open the page shown below that gives users an easy way to make bulk additions or deletions of tiles in rooms. The table shows all devices listed in the first column and all rows are listed in the top row. You can filter which devices are listed by selecting the types that you want to be shown. You can also limit the devices shown to a specific hub by selecting that hub in the list, or if you want all devices select the All Hubs box. The None option will show only hubless devices.
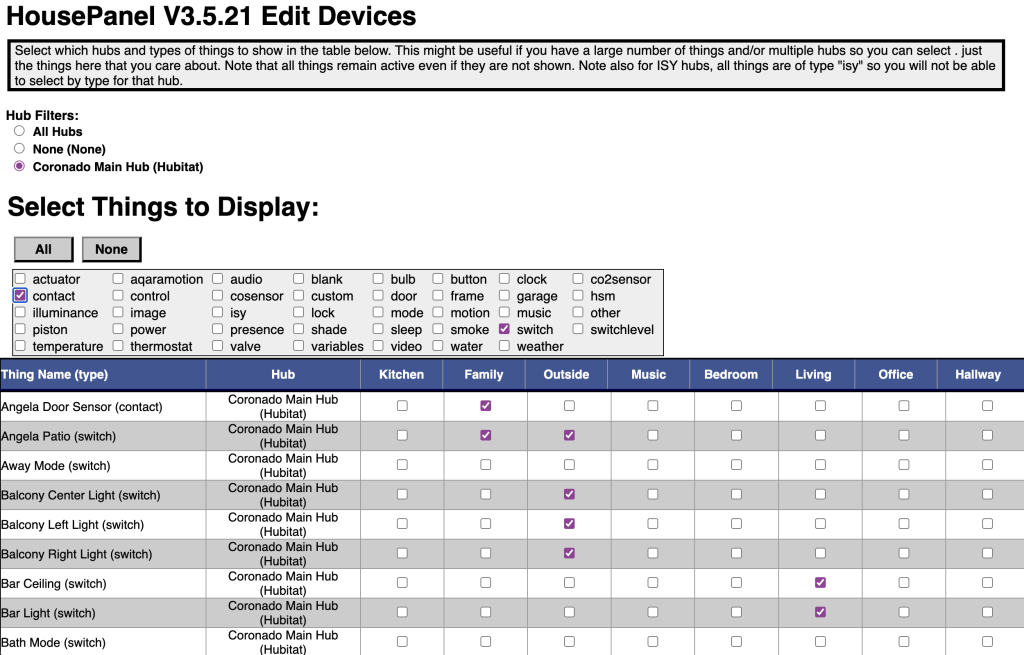
Everywhere you see a check mark means the thing of that “row” will be shown in the room of that “column”. You can add or remove a check mark in any room for any thing. You can select any number of devices for any given room. The example above shows lights in the Family room, Outside room, and the Living room. A typical installation would check the clock row for every room to place a clock on all pages. The table also shows the hub name and type for each device listed in the table.