
HousePanel Installation on Hub (HousePanel.groovy)
HousePanel is designed to work with Hubitat and Universal Devices ISY hubs. Sonos hubs are also supported but this feature is experimental and not fully documented. If you have multiple hubs you can link all of them to your HousePanel setup. For Hubitat hubs, installation begins with installing HousePanel.groovy file into your account. You will find the HousePanel.groovy file in the main hpserver GitHub repository. For Universal Devices ISY you do not need to install anything additional but you need to know the IP address and login credentials for your ISY hub. You can install any number of Hubitat and ISY hubs, and a single Sonos account. This feature is a great way to make a gradual transition from one hub to another. Multiple Hubitat hubs on any account have been tested to work properly.
Hubitat Package Manager Method
The easiest way to install the groovy app onto your Hubitat hub is to use the Hubitat Package Manager (HPM). HPM must first be installed following the guide provided here. Once installed, use the search by keyword feature and enter “housepanel” as the keyword. It should return a page that looks as follows:
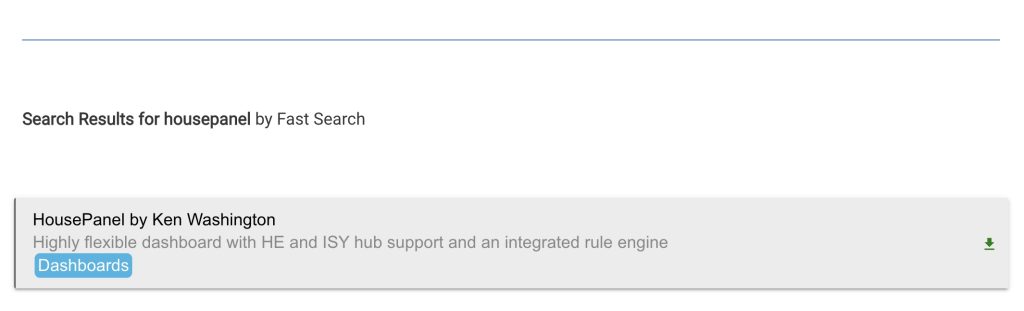
From there, proceed by clicking on the box shown. The installation will proceed automatically.
Manual Installation Method
You can also instal the groovy app manually by opening the source from GitHub found here.
https://github.com/kewashi/HousePanel/blob/master/HousePanel.groovy
With this file open click on the “raw” icon in the upper right corner. This will open a window showing just the “raw” lines of code. Then Copy the entire file to the clipboard using Control-A (or Command-A on mac), then Control-C (or Command-C on a mac).
Next log into your hub’s configuration main page. If you know your Hubitat hub IP, you can log into it directly, or you can locate it by navigating to
https://portal.hubitat.com/
Once you are logged into your hub, select “Apps Code” from the menu on the left. Then click on “New App”. A blank page will open where you paste in the raw source copied above from GitHub using Control-V (or Command-V on a mac). Select save and give it the name HousePanel. You must also turn on OAUTH for your groovy app. To do this, click the OAUTH button in the upper right corner of the Hubitat IDE page. This will open a window revealing two long strings of data called CLIENT_ID and CLIENT_SECRET. There are two ways to authorize your hub. The easiest and recommended way is to use the AccessToken displayed in the log screen. The alternate way requires the use of these two values, so you may want to make a note of them for later use. when you are configuring the Node.js server. Both methods will be described in greater detail later.
HousePanel Installation on the Server (hpserver.js)
Unlike prior versions, there is now only viable HousePanel installation option. The good news is this one and only option is significantly simpler than any of the options available for the original HP version written in PHP. Because HP has been rewritten in the modern Node.js language and uses an industry standard SQLite database, installing it on any server platform is basically identical.
I will skip explaining how to set up and configure a standard Linux or Raspberry Pi server. This guide assumes you know how to do this and that you have this already set up. The first step you must take is to confirm that you have NPM and Node.js installed on your server of choice. HP has been installed and tested successfully on a Raspberry Pi, Free BSD Unix, and Windows 10 using Git Bash.
Node.js Installation
HousePanel installation requires that you have NPM and Node.js both installed on an always-on server. You will need to have admin privileges on the server to install and configure the HousePanel server module. The best place to start for installing both is here:
https://www.npmjs.com/get-npm
Another option for Raspberry Pi users is to log into your rPI using ssh and enter the following commands:
wget http://node-arm.herokuapp.com/node_latest_armhf.deb
sudo dpkg -i node_latest_armhf.deb
Another alternative for installing Node.js and NPM are here:
https://www.instructables.com/id/Install-Nodejs-and-Npm-on-Raspberry-Pi/
Regardless of which method you use, you should check to make sure you have Node.js installed properly by running the following commands:
npm -v
node -v
This should return NPM version of at least 8 and Node version of at least 16. If not you will need to upgrade.
Installing HousePanel’s Server Module (hpserver)
HousePanel uses a server module called “hpserver.js” that is a Node.js app. Installation of hpserver involves cloning the HousePanel GitHub repository into a sub-folder of your choice using the following commands:
git clone https://github.com/kewashi/HousePanel.git
cd HousePanel
npm install
If you do not have Git installed, it will also work fine to download the source files from the GitHub website as a zip file or other means. The only important thing to remember is to ensure you keep all files in their respective sub-folders, and that you run “npm install” in the main hpserver directory once the files are in place.
Starting HousePanel Server Module
Next, you need to launch hpserver in background mode. I also recommend piping all debug and error outputs to a log file. How this is done is system dependent. On a Raspberry Pi or other Debian based Linux system, the following command is used:
node hpserver.js > hpserver.log &
If you are using Free BSD Linux, you will need to use the daemon service to launch HousePanel as follows:
sudo daemon -o /var/log/hpserver.log node hpserver.js
The server will launch and silently prepare all steps required to view the HousePanel dashboard in your browser. The first variant will send any debug output to the file named “hpserver.log” and the second variant will send debug output to the /var/log/hpserver.log file. Please note that ANY number of browsers can point to this same server and render HP dashboards, so this is the only server instance you need.
You should now be ready to launch your panel in a browser. Before you do, let’s review a few things to confirm that your HousePanel installation is ready to go. Before trying HousePanel on your Tablet or Cell phone, confirm that it loads properly in a desktop browser. Using HP on a computer is by far the easiest way to configure your panel anyway, so starting with a PC is a must. HousePanel has been tested with Chrome (on a PC, iPhone, iPad, and Android tablet), Microsoft Edge (on a Windows 10 PC), IE 11 (on a Windows 7 and Windows 10 PC), Safari (on a Mac and iPhone), Silk on an Amazon Fire table, and Fully Kiosk Browser (on PC, an Android tablet, and an Amazon Fire tablet). All have been confirmed to work but others are likely to work as well. Fire tablets work as well if you use the APK to load Fully Kiosk Browser. The Silk browser works but videos don’t load properly. Fully Kiosk, Chrome, and Edge work the best in my experience.
Browse to the server that you installed above and use the default port “8580” to display your dashboard. Lets assume your server is at 192.168.1.50, then you would enter:
http://192.168.1.50:8580
The default port of 8580 can be changed by providing a housepanel.cfg file as explained later; however, the server will need to be stopped and restarted for a port change to take effect.
To stop and restart the server, you have to find the process ID for the active server. This is done using the standard Linux/Unix command:
ps aux | grep hpserver | grep -v grep
kill -9 <pid>
node hpserver.js >& hpserver.log &
where <pid> is the process ID returned by the first statement. For most setups the following variant will do this for you automatically:
hpid=$(ps ax | grep hpserver | grep -v grep | cut -c1-6)
kill -9 $hpid
node hpserver.js >& hpserver.log &
On Windows in a Git Bash session, the following will usually work:
hpid=$(ps ax | grep nodejs | cut -c4-12)
kill -9 $hpid
node hpserver.js >& hpserver.log &
If you are using BSD Unix, replace the last line with the same daemon line noted above.
Feel free to write your own scripts to stop and/or restart your HousePanel server. You may also want to install it as a service. Instructions for doing this are beyond the scope of this document.
Congratulations if you made it this far on a successful HousePanel installation.